Streamlining Quality Control: Using Scantech 3D Scanner and Geomagic Control X for Automated Deviation Analysis
In today’s fast-paced manufacturing environment, obtaining reliable data quickly is crucial. One of the most effective ways to achieve this is through deviation analysis, where scanned data is compared against an extrapolated version of itself to identify any deviations from a theoretical normal. In this post, we’ll explore how to use the Scantech 3D scanner in conjunction with Geomagic Control X to create automatic deviation analysis reports, streamlining your inspection process.
Step 1: Scanning with Scantech 3D Scanner
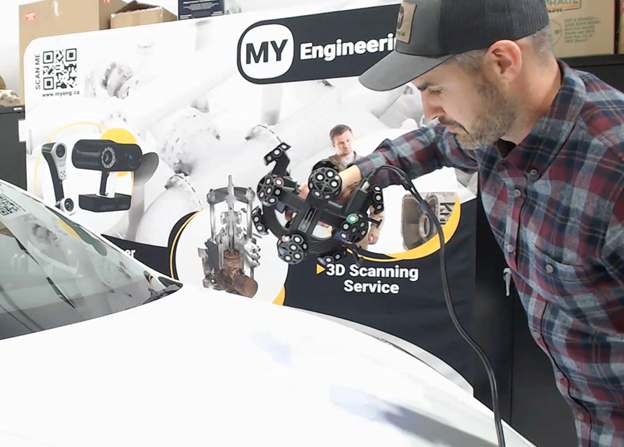
The process begins with capturing high-precision 3D data using the Scantech 3D scanner. Scantech offers a range of portable scanners known for their accuracy, speed, and ease of use. To start, position the scanner at the appropriate distance from the object, ensuring it captures all relevant features. The scanner’s software interface guides you through the scanning process, allowing real-time visualization of the scanned data to ensure comprehensive coverage.
Step 2: Preparing the Data in Geomagic Control X
Once the scan is complete, the data is imported into Geomagic Control X, a powerful metrology software designed for inspection and quality control. Geomagic Control X simplifies the process by analysing the scan data without requiring a CAD model. Using its intuitive tools, you can quickly set up an inspection plan, define key measurement parameters, and identify critical areas for analysis.
Step 3: Conducting Deviation Analysis
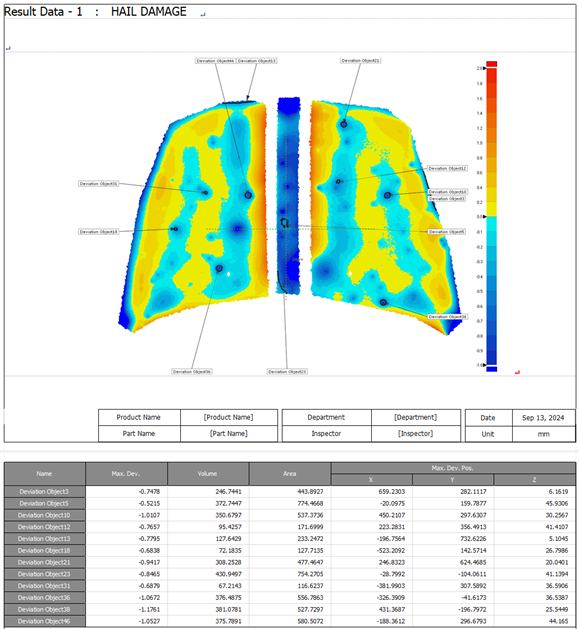
With the desired parameters entered, Geomagic Control X automatically performs a deviation analysis. This process compares the scanned data to an extrapolated surface, highlighting areas that deviate from the surrounding mesh. The software generates a color-coded deviation map, making it easy to visualize where the part meets or falls short of specifications.
Step 4: Generating Reports
After completing the analysis, Geomagic Control X enables you to generate comprehensive deviation analysis reports automatically. These reports include all relevant data, such as deviation measurements, inspection results, and visualizations, providing a clear and concise overview of the part’s quality. Reports can be customized to include company branding, specific measurement criteria, and any additional notes, making them perfect for sharing with stakeholders or for documentation purposes.
Benefits of Automation in Deviation Analysis
Automating deviation analysis with tools like the Scantech 3D scanner and Geomagic Control X offers numerous benefits:
Increased Efficiency: Automating repetitive tasks reduces the time needed for analysis and reporting.
Improved Accuracy: High-precision scanning and automated software reduce the risk of human error.
Enhanced Visualization: Color-coded deviation maps and detailed reports provide clear insights into part quality.
Scalability: The process can be easily scaled to handle large volumes of parts, making it suitable for high-production environments.
Conclusion
The combination of Scantech’s 3D scanning technology and Geomagic Control X’s powerful analysis tools provides a comprehensive solution for quality control. By automating deviation analysis, you can ensure your products meet the highest standards while saving time and resources.
If you’re looking to improve your quality control process, integrating these tools into your workflow could be the key to achieving greater accuracy and efficiency.
In this Video tutorial, Product Specialist Mark Steblyk reviews how to use the Deviation Analysis Tool in GeoMagic ControlX to analyze scans captured used the Scantech Trackscan Sharp.


